Tuesday, October 28, 2008

Optimizing tempdb and log disk performance

We implemented a new SAN fairly recently: an HP EVA. In the enthusiasm to move to this new device, some tuning decisions were overlooked or made quickly, and are now being revisited. For example, all the drives allocated to database servers were created on VRAID5 (essentially equivalent to RAID 5, refer to HP's IT Resource Center for the nuances).

In general, it's a known fact that RAID 10 (aka VRAID1) outperforms RAID 5 (aka VRAID5) for write-heavy workloads, but at a higher cost per GB. I wanted to revisit the cost-benefit analysis that led us to use RAID 5, because I've always used RAID 10 for at least logs and tempdb in the past, and for all SQL data when possible.

To make sure that my analysis was relevant to our particular IO load, I planned to generate load on each type of drive using IOMeter, for which I would need to construct an appropriate workload. I recorded a Counter Log with the following counters from each drive using Windows Performance Monitor from our main OLTP server over the course of several days.
  • Avg Disk Bytes/Read
  • Avg Disk Bytes/Write
  • Avg Disk Queue Length
  • Disk Reads/sec
  • Disk Writes/sec
Using these counters, I constructed a characteristic workload for each drive.

To do this, I first bucketed each reading of Avg Disk Bytes/[Read, Write] into a size category (.5K, 1K, ...64K, 128K, etc.) and chose enough categories to add up to 80% of the total in order to determine what size IOs to generate.

Then I added the averages of Disk Reads/sec and Disk Writes/sec in order to get the percentages of reads and writes against each disk, and used the average of Avg Disk Queue Length to determine how many IOs outstanding to queue up.

Finally, I ran through this whole exercise again after deciding to filter for Disk Queues > 2. I did this because I figured that the SAN probably wasn't having any trouble when disk queues were low - RAID 5 vs RAID 1 would only show a difference in latency during those times. The trouble comes when loads (for which disk queues are a proxy) are high; that's when you need maximum throughput and minimum response time.

After all this, I came up with the following characteristic workloads for our system (yours may vary substantially):

TEMPDB
Reads - 2%
- 68% 64K read size
- 32% 8K read size
Writes - 98%
- 83% 64K write size
- 17% 512B write size
600 IOs outstanding

LOGS
Reads - 36%
- 87% 128K read size
- 13% 1024K read size
Writes - 64%
- 81% 64K write size
- 19% 16K write size
4 IOs outstanding

Next I worked with our Systems Engineering group to create a VRAID5 and a VRAID1 drive of the same size and attached both to the same server. I created Access Specifications with IOMeter for each workload shown above (see image below), and then ran those Access Specifications against each drive with the requisite number of IOs outstanding.

This yielded some fairly conclusive results. I won't post the actual throughput numbers, but here are the margins by which VRAID1 outperformed VRAID5 for each workload:

TEMPDB
IOPS MB/s Avg IO Response Time
117.65% 117.55% 51.48%

LOGS
IOPS MB/s Avg IO Response Time
80.05% 65.63% 39.69%

So according to my testing, VRAID1 is vastly superior for these types of workloads, to the point where it's probably worth the higher cost per GB. We'll see how this bears out in further testing and in real-world usage shortly...

Monday, October 27, 2008

Using local disks in a cluster

With the advent of (relatively) cheap, fast Solid State Disks, DBAs everywhere are realizing that they could potentially see huge performance gains by incorporating these new disks into their database servers. This is straightforward if you've got a monolithic box: buy 2 SSDs, create a new RAID 1, move tempdb and/or logs onto it, restart SQL, shake well, and watch your IO waits go to 0! Hopefully, anyway.

However, if you've got a cluster, things are a bit trickier. The SAN vendors are still ramping up their SSD support, so it can be difficult to get an SSD into a shared storage enclosure unless you roll your own. Especially if you pick up one of the most promising new disks, the FusionIO ioDrive. This disk gets attached to a PCIe bus directly rather than a SAS or SATA backplane, so it can't be put into most commercially available shared storage devices (SANs, NASs, etc.).

Even so, we were sufficiently impressed by the IO stats on this disk to pick up a couple of them, but we still wanted to put them in our production cluster. We can't use them for shared data, obviously, as the data wouldn't persist between machines. But in theory they could be perfect for tempdb, which gets wiped out on each restart and so only needs to see the same path on each machine. I figured there was probably a way to get Microsoft Cluster Services to see the local SSDs on each machine as the same disk.

To test this theory, we (I and coworker Doug H.) took a pair of virtual machines, added drives to simulate a standard local disk, shared SAN storage, and the new SSD, built them into a cluster, and installed SQL Server 2005 on the R: drive.

Disk 0 (C:) - local - boot disk
Disk 1 (Q:) - shared - quorum
Disk 2 (R:) - shared - SQL data
Disk 3 (D:) - local - simulated SSD

When the VMs were initially configured, the fake SSDs were created on the same SCSI bus as the boot disk. The cluster administrator quickly informed us that this would not fly - disks on the same bus as the boot disk cannot be used as shared resources. So we moved the D: drives to a new bus, separate from both the C: (simulated backplane) and Q:/R: (simulated SAN) drives.

The next step was to add the D: drive to the cluster. I assumed this wouldn't work without some hacking, but I decided to try a "baseline" attempt without any modifications. The Cluster Admin New Resource wizard allowed me to add the D: drive on one of the nodes, but it wouldn't come online. So much for the baseline attempt.

I knew that Windows 2003 (though maybe not 2008) clustering relies on disk signatures to identify disks for cluster operations, so I decided to synchronize the signatures of the two fake SSDs. To this end, I found a utility - MBRWizard - that would let me manually set the signature of an MBR disk.

Using this utility, I found the signature of the D: drive on machine #1:

mbrwiz /Disk=3 /Signature

and then overwrote the signature of the D: drive on machine #2:

mbrwiz /Disk=3 /Signature=xxxxxxxx

Then I added the disk as a cluster resource again, and brought it online. Success! Failover worked, too, so I failed the SQL Server group (Group 0 in the image below) back and forth between nodes and created a Data directory on each D: drive.


The next step was to make sure it worked with SQL Server. I took SQL offline, added Disk D: as a dependency, and brought it back up. Then I altered tempdb's location to use the D: drive after a restart.

alter database tempdb
modify file (NAME=tempdev, FILENAME = 'D:\Data\tempdb.mdf')
GO
alter database tempdb
modify file (NAME=templog, FILENAME = 'D:\Data\templog.ldf')
GO

Finally I took SQL offline and brought it back up, with fingers crossed. And it worked! Failover worked too.

So my proof of concept for using a local SSD in a cluster (for tempdb only!) was successful. Stay tuned to see if it works in the real world.

Friday, October 3, 2008

Running a Buildbot buildslave as a Windows service

Buildbot is an open source continuous integration system written in Python. We use it to automate the builds on one of the projects I work on, and in general, it's cool. Pretty easy to set up (just make sure you look at every setting in the config file), comes with its own simple but handy web interface, and allows quick configuration of multiple "builders" and "buildslaves."

However, like most open source projects, it's written for and by *nix users and doesn't have full Windows support. Fortunately, Mark Hammond (of win32api fame) deigned to write the buildbot_service.py file, which allows installation of the Buildbot buildmaster as a service.

But despite this, there's no out-of-the-box way to run a buildslave as a service. There are a few other hardy souls out there who have figured out various methods for accomplishing this, and I am indebted to their guides as helpful starting points. But I didn't like all the registry hacking and configuration steps, so I went another way. Hammond's buildbot_service.py scares me, but I gleaned enough from it to put together my own buildslave_service.py.

It's not terribly full-featured, and it requires reinstallation if any settings are changed, but it's compact, effective, and easy to install.

Steps:
1) Copy code below, correct spacing that Blogger's HTML window stripped out, change paths as appropriate, save as buildslave_service.py.
2) Install the service (w/ optional parameter for automatic startup if you want):
python buildslave_service.py install [--startup=auto]
3) Start the service:
net start Buildbot_Buildslave
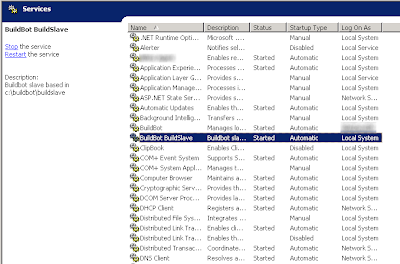
(or use the Services mmc snap-in)

And that's it! Easier than all the registry mess and downloading Win2003 resource packs, no?

""" buildslave_service.py

Original Author: Ira Pfeifer
Email: ipfeifer -dot- tech -at- gmail
"""

import sys
import os
import subprocess
import win32serviceutil
import win32service
import win32event
import win32api
import time

from buildbot.scripts import runner
from buildbot.scripts.startup import start

# change paths as appropriate
slavepath = "c:\\buildbot\\buildslave"
homepath = "\\"
os.environ['HOMEDRIVE'] = "C:"
os.environ['HOMEPATH'] = homepath
os.environ['PATH'] = ";".join([
r"C:\Python25"
,r"C:\Python25\Scripts"
])

class BuildSlaveService(win32serviceutil.ServiceFramework):
_svc_name_ = "BuildBot_BuildSlave"
_svc_display_name_ = "BuildBot BuildSlave"
_svc_description_ = "Buildbot slave based in " + slavepath


def __init__(self, args):
win32serviceutil.ServiceFramework.__init__(self, args)
self.stop_event = win32event.CreateEvent(None, 0, 0, None)

def SvcDoRun(self):
# The service starts a subprocess that will run the actual buildbot
# so that it can be stopped by simply killing off the subprocess.
self.child = subprocess.Popen(["python",
__file__,
"start"])
isAlive = True
while isAlive:
time.sleep(10)

def SvcStop(self):

self.ReportServiceStatus(win32service.SERVICE_STOP_PENDING)
handle = win32api.OpenProcess(1,0,self.child.pid)
# returns exit code - wrap w/ error handling?
win32api.TerminateProcess(handle, 0)
win32api.CloseHandle(handle)
isAlive = False
self.ReportServiceStatus(win32service.SERVICE_STOP_PENDING)
win32.SetEvent(self.hWaitStop)

SvcShutdown = SvcStop

def start_buildslave():
config = runner.Options()
config.parseOptions(['start',slavepath])
so = config.subOptions
start(so)


if __name__ == '__main__':
if len(sys.argv) > 1 and sys.argv[1] == "start":
start_buildslave()
else:
win32serviceutil.HandleCommandLine(BuildSlaveService)